Creating and Viewing Your Entries in a Journal
To access the entries in a journal, select the Journal option from the Grow menu at the top of the screen. This will take you to a listing of your journals. Select the journal you wish to work with by clicking on the title in the table. You will then enter that journal.
Creating an Entry
At the top of the page you will see a text box as illustrated in Figure 2. To create a new entry, all you need to do is type your thoughts into this box and then press the Create Journal Entry button. Your entry will show up in the listing below.

Figure 2
You can also create entries directly from many pages in the system. We will cover that in more depth on the next page.
Viewing and Editing an Existing Entry
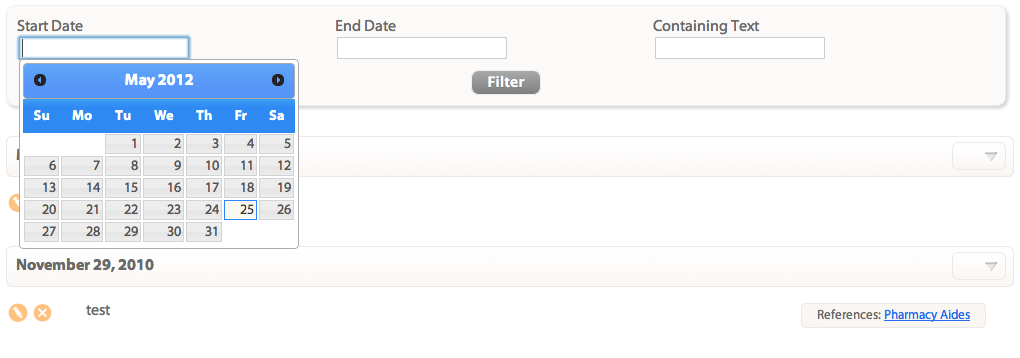
If you have already created an entry in the selected journal, you will see them listed in a table at the bottom of the page. You can filter the entries by entering a date range or a search term in the filter options, as shown in Figure 3 below. When you click the Filter button, the table will update with the relevant entries.

Figure 3
Next to each entry there are two icons, one for edit and another for delete. You can see these icons in Figure 3 above. If you click on the edit icon, the entry will be replaced with a text box where you can edit your entry. If you click the delete button, the entry will be removed from the journal.
From here you may wish to take a look at: